Summertime - Start a blog...
Pirate Tips Live!
One of the easiest ways to have a web page is to create a blog. Your newest content will always appear at the top of the page, you can add a variety of content, and you can post in a number of ways.
Your pinckneypirates.org account (or any google account) has a Blogger account connected to it. Which means that your username (including @pinckneypirates.org) and password will grant you access to the wonderful world of simple web publishing.
In this post I'm going to offer a few "levels" of blogging:
- Just the basics - you can post and people can read what you write
- Enough to be dangerous - your posts might include some pictures and videos, as well as scheduled posts
- Showing off a little - you can post to your blog from your phone or email
Let's get started.
Just the Basics
1. Logging in
Believe it or not, this may be the most challenging part of this tutorial. Logging in is not hard, but there are a number of variables here, and I may not be able to address all of them. To make it as consistent as possible, please start by logging into your Gmail account (pinckneypirates.org).From here we will click on the app shortcut in the upper right corner of the page.
Next select the More link at the bottom of the list. **

Next select the Blogger button from the list. **

Then a little "multiple choice" for the next steps...
If you have a blogger account set up you will be logged right in. Skip ahead to creating a post.
If this is your first visit to blogger you will need to confirm your profile and choose to use a Google + profile or Blogger profile. For this tutorial I will go with a Blogger profile.
To continue, enter a name and proceed. You will land on a page that looks like this:


2. Creating a post
Click on the orange button by the title of the blog to create a post.
- Back to the Blogger dashboard where you can create additional posts, blogs, etc. It's where you land after you log in.
- A link to your public blog. It only shows you PUBLISHED POSTS, so if you are working on one, it won't show yet.
- This is where you put the title of your post, but you probably figured that one out...
- The PUBLISH button - if you push this your post goes live for the world to see. Blogger doesn't care if you are outlined, proofread, or finished. If you push publish it is posted. (Unless you have scheduled the post for later - that's in the more advanced section.)
- The SAVE button saves your post. It is NOT published, just saved. You can leave it saved and unpublished as long as you want.
- The PREVIEW button shows you how the post would would look on your blog using the current theme.
- The CLOSE button closes the post and returns you to the Blogger dashboard.
- COMPOSE/HTML toggle switch. Compose (the default) is like editing in Word. HTML editing is for advanced users. If you want to learn this you will want to do a google search for a tutorial.
- Editing buttons. These are mostly standard buttons. Hovering over each button will name the function. The only two that need a little "extra" description are Insert jump break and Remove formatting.
- INSERT JUMP BREAK puts a break in the post so only the first part shows, with a "Read more..." link to see the whole article.
- REMOVE FORMATTING does just that - it removes the formatting. Use this button to "clean up" the text when you copy info from another source (web page, document, email, etc...).
Enough to be Dangerous
1. Adding images
Inserting images in your post is simple. For this example I will add a screen shot.Put the cursor in the location where you would like to add the image. I always put it at the start of the line where I want the image. Later I decide if the image goes to the left, right, or center.
Next I'm going to click on the Insert image button on the toolbar.

Now I'm ready to select the image.


Select the image you want to upload and click the Open button.

The image will be added to your File selection window. Click on the image and click the Add selected button.

The image is now inserted in the post.
If you click on the image you will have some options for adjusting the image.

2. Adding video
Just like images, video is a simple addition to the page. Videos can be uploaded directly to the blog (from your computer, phone, or webcam), or linked to YouTube. To add a video put the cursor in the location where you would like to add the video and click the Insert a video button.

3. Scheduling posts
One more "medium" level trick to help you get ahead. You can schedule posts to appear at a predetermined time. I schedule these posts to appear on Monday mornings around 9 am. I start working on them weeks in advance and set the schedule. Here's the trick...On the right side of the screen there is a column of links under the Publish button (it may be only showing the icons if your on a smaller screen - just hover over the icons to reveal the links). One of the links is labeled Schedule. Click it.

The drawer will slide open to reveal the choices. The Automatic choice will post as soon as you click the publish button. Select the Set date and time choice to determine your publishing date.


Showing Off a Little
1. Posting through SMS/MMS/email
Here's a fun way to make posting a BREEZE - especially if you want to make short posts.From the blog dashboard, click on the Settings link (bottom of the menu on the left) and select Mobile and email.
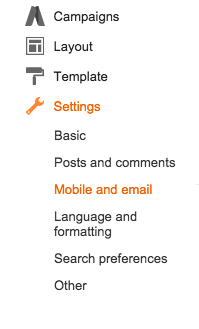


To post via email you will need to go to the same Settings page (Mobile and email).
This time we will focus on the email section. You will need to add a secret word in the middle of the address and select to save the emails as drafts or publish immediately.

Be sure to press the Save settings (orange button in the upper-right corner) before leaving the page.


Comments
Post a Comment